Getting Your Cloudflare R2 API Keys
Before you can use the Uploader Template, you need to set up your Cloudflare API keys. This guide will walk you through the process. We will assume you have already set up your Cloudflare account and have a domain name managed in Cloudflare.
- Open Cloudflare's dashboard.
- Go to Cloudflare.
- Navigate to the R2 Object Storage.
- Click on the
R2 Object Storagetab in the left sidebar.
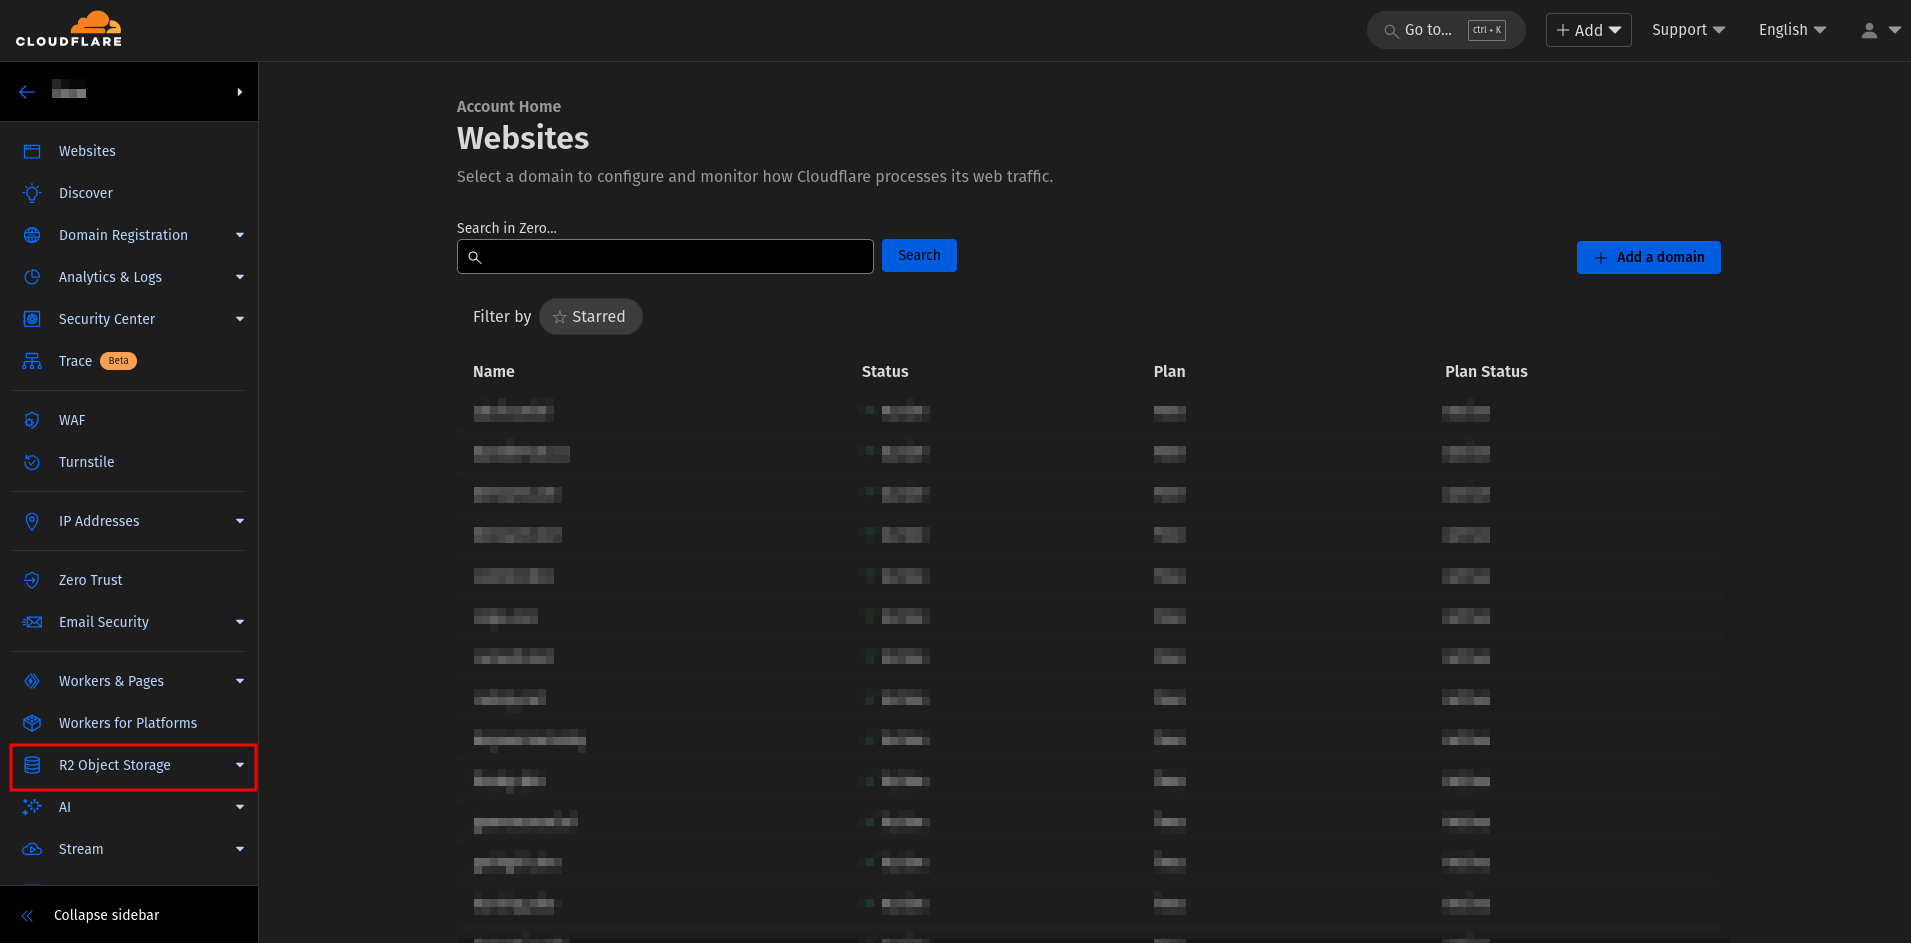
- Click on the
- Create a new API token.
- Assuming you have already set up your R2 bucket, click on
Manage R2 API Tokens.
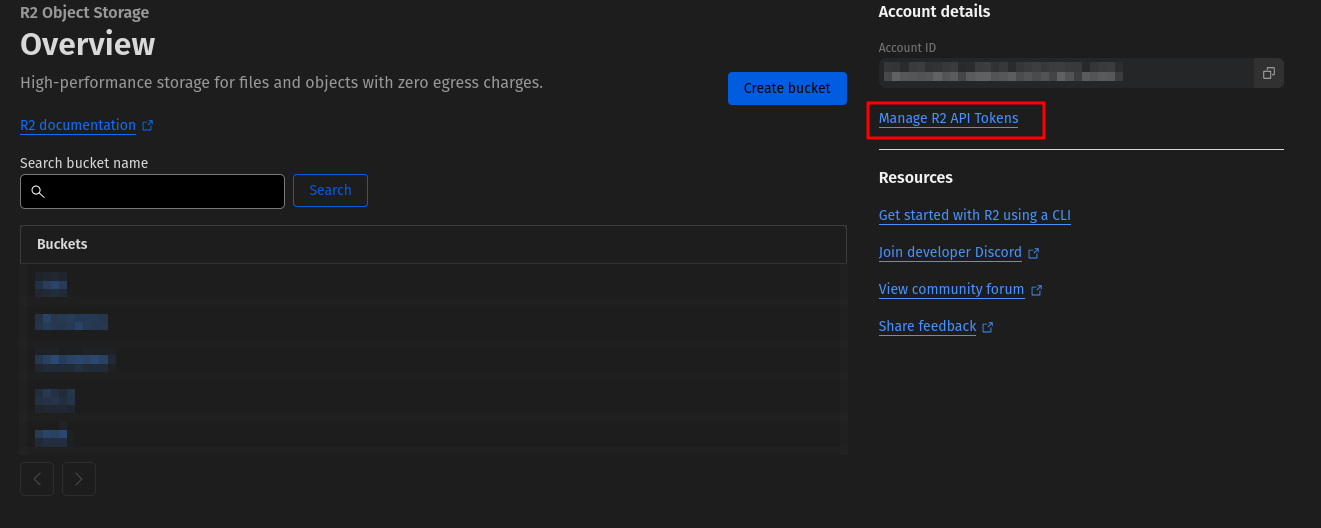
- Click on
Create API Token.
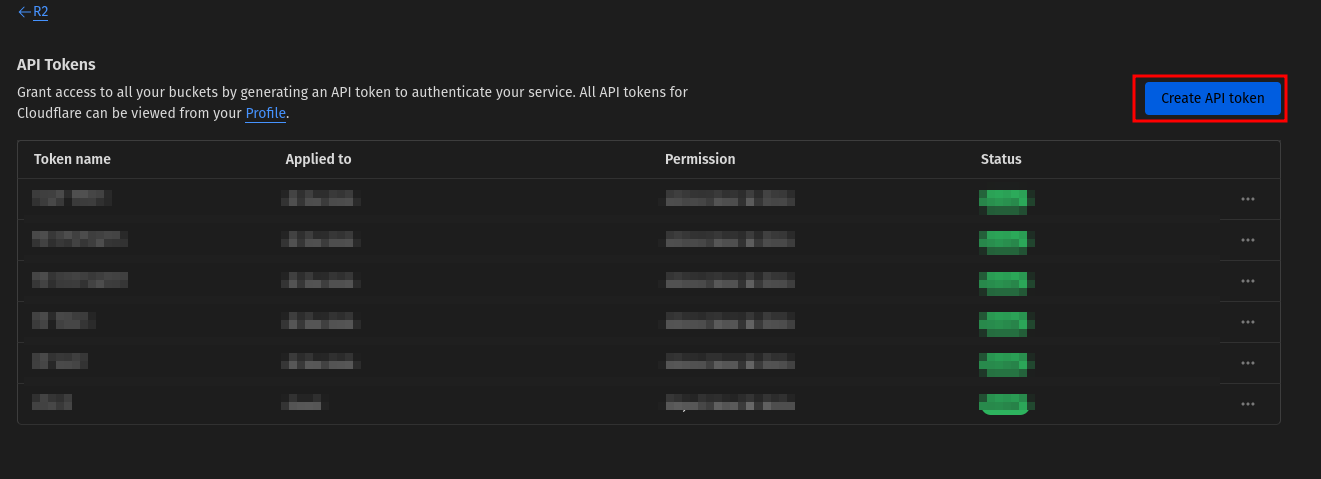
- Assuming you have already set up your R2 bucket, click on
- Configure the API token.
- Give your token a name and select the permissions you want to grant. In our case
Object Read & Writeis sufficient. - It is recommended to Specify a bucket to limit the token's access.
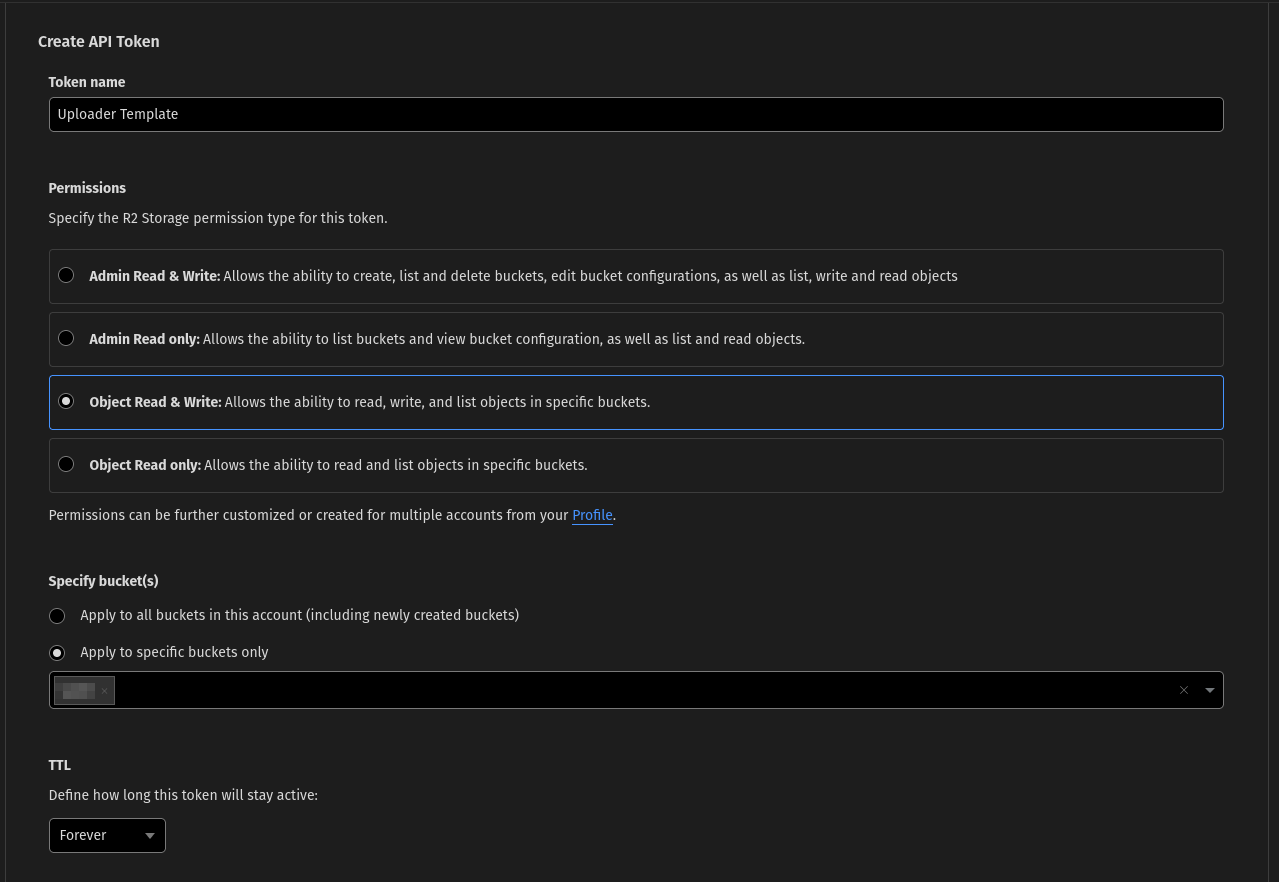
- After configuring the token, scroll down and click on
Create API Token.
- Give your token a name and select the permissions you want to grant. In our case
- Copy the Values To Your .env.
- Copy the
Access Key ID,Secret Access Keyandjurisdiction endpoint urlvalues to your.envfile.
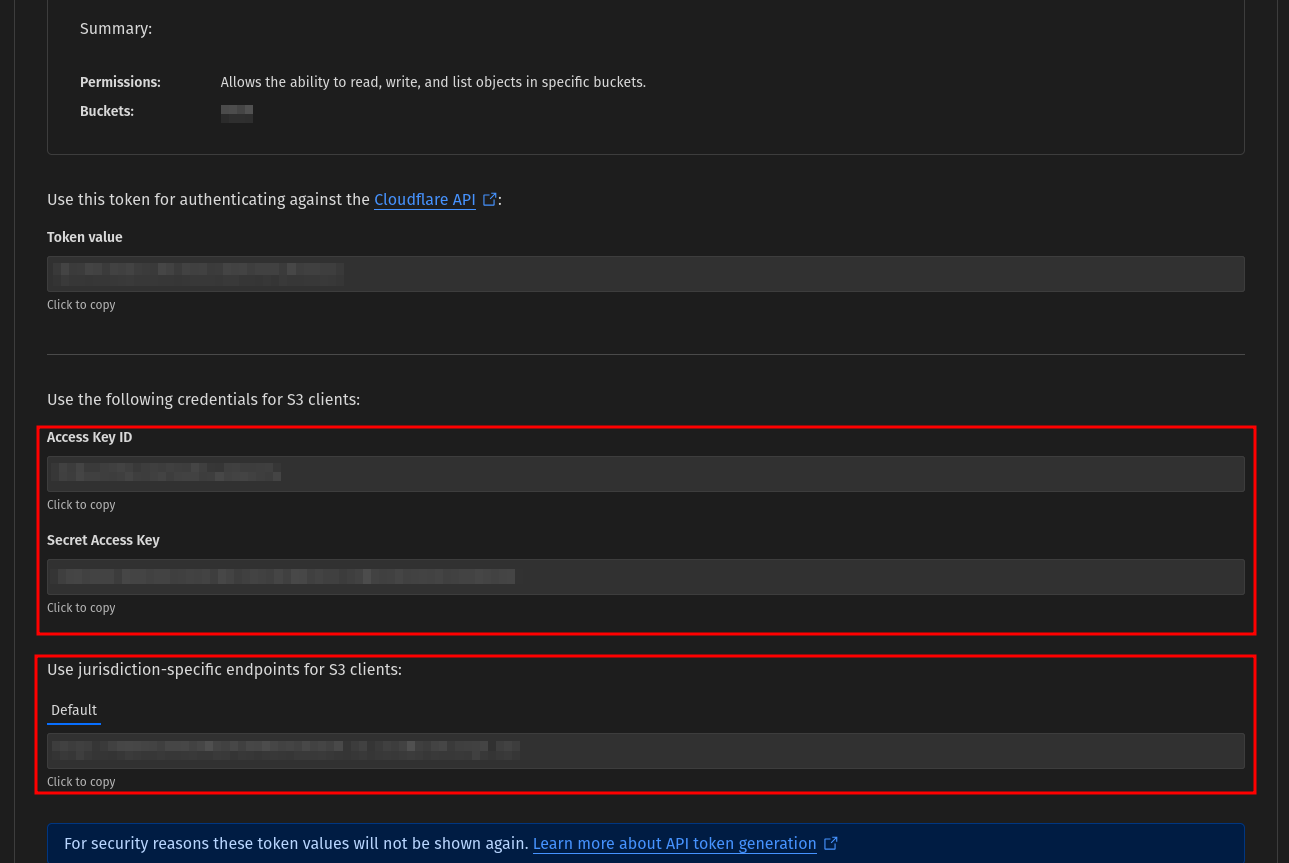
- Your
.envfile should look like this:
PORT=":your-port" CLOUDFLARE_R2_ACCESS_KEY_ID="Access Key ID" CLOUDFLARE_R2_SECRET_ACCESS_KEY="Secret Access Key" CLOUDFLARE_R2_BUCKET="Your Bucket Name" CLOUDFLARE_R2_ENDPOINT="https://12sd3aasd12sd23sd123.r2.cloudflarestorage.com" R2_URL="https://r2.example.com" - Copy the
- Start the Application.
- Run the application locally to test your setup:
go run src/main.go- You’ll see the server start successfully, indicating the app is live. By default, it will run on http://localhost:your-port.
- Test it using a tool like Postman or Insomnia.
